UPSB v3
Approved Tutorials / MPMX dori style :)
with more audible click mechanism!
-
Date: Thu, Feb 26 2009 01:43:22
Edit 11/18/09: Fixed the pics; i hate photobucket -.-
Firstly, I don't expect this tutorial to be approved or anything; its just for the people that wanted to know how to make it.Yay! It got approved. :]
Secondly, after a few pms and much effort trying to explain, I couldn't; so, people asked for a formal tutorial. I hope it makes sense for you guys this time!
I know I promised sooner, but I was busy making more MP MX's; sorryy >"<
Third; this is only my second tutorial, so please let me know if any clarification is needed! I always tend to overlook some things...
And lastly, please commence to the tutorial!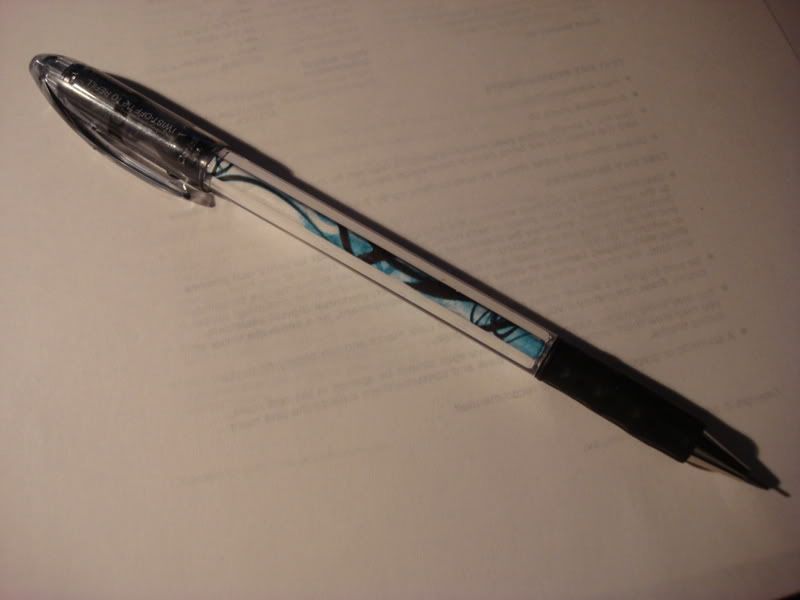
[original insert by homesliceme]
THIS THING CLICKS LIKE A BEAST!
Stats
-------------------------------------------------
Name: MP MX
COG: same as MX
Length: same as MX
Weight: same as MX
Style: single sided, MP
Writing-Mechanism: Mechanical pencil
Ink-Type: 0.7 lead
Estimated-Cost: ~$5.50
-------------------------------------------------
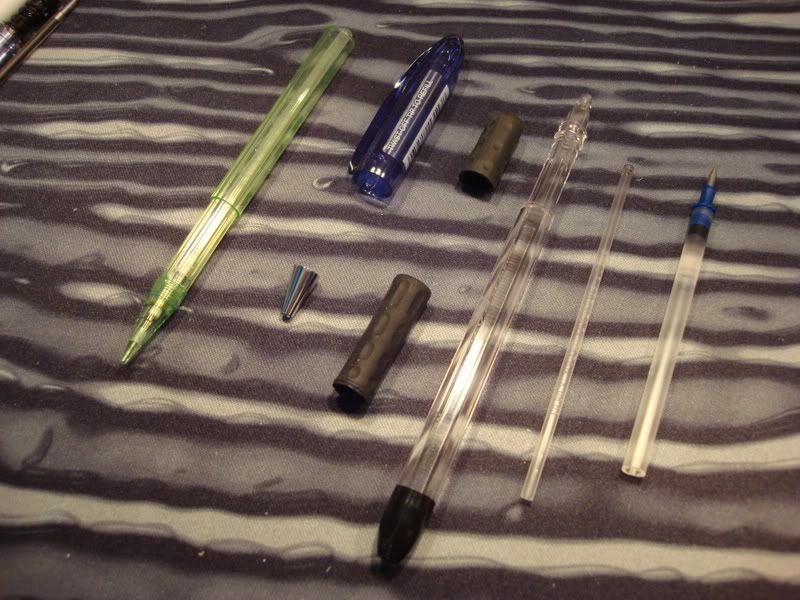
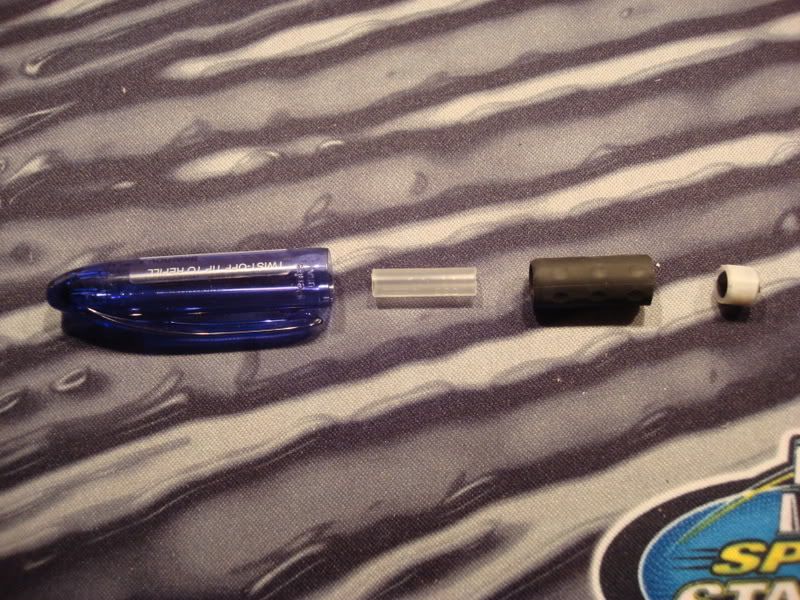
Materials List: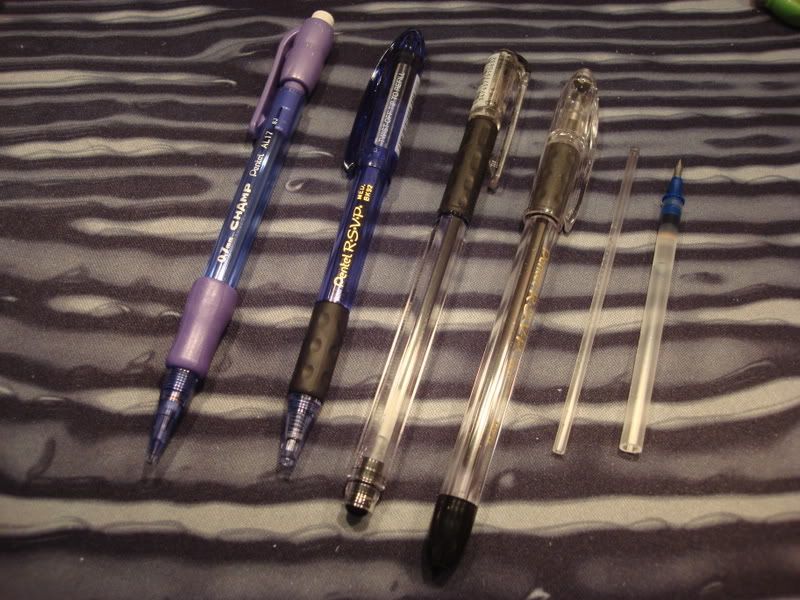
(from left to right)
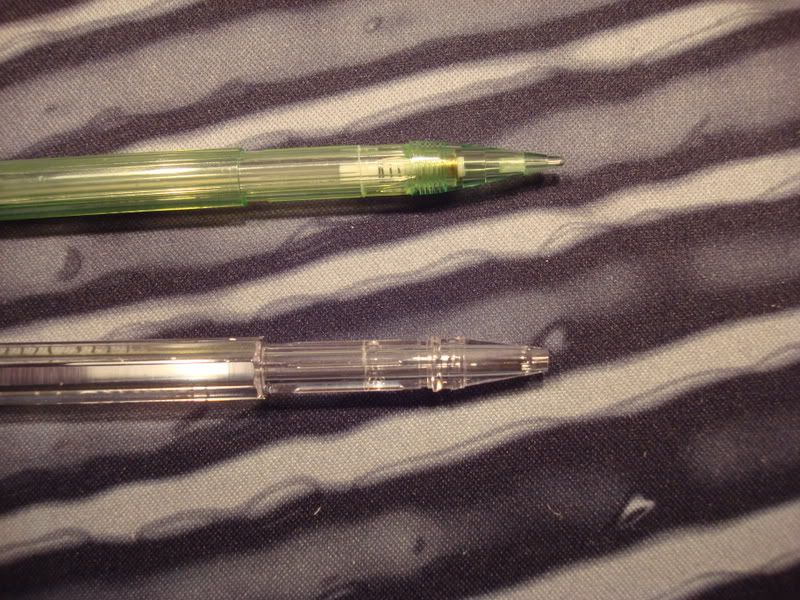
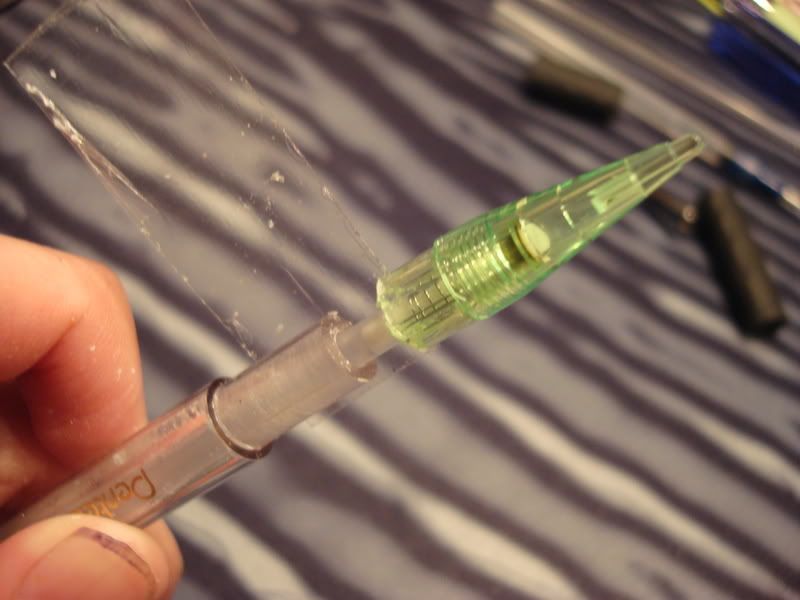
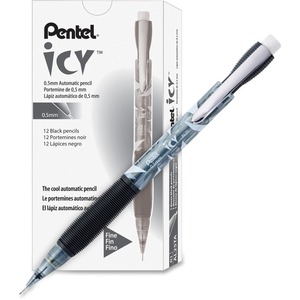
A. Pentel Champ MP: you need everything except the back eraser part and the grip (can be subbed for Icy)
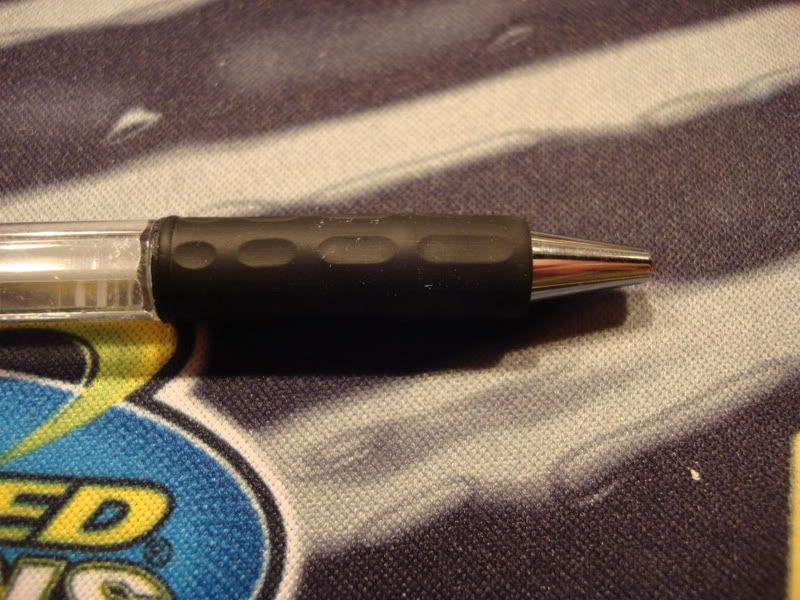
B. Pentel RSVP Retractable: only need the cap
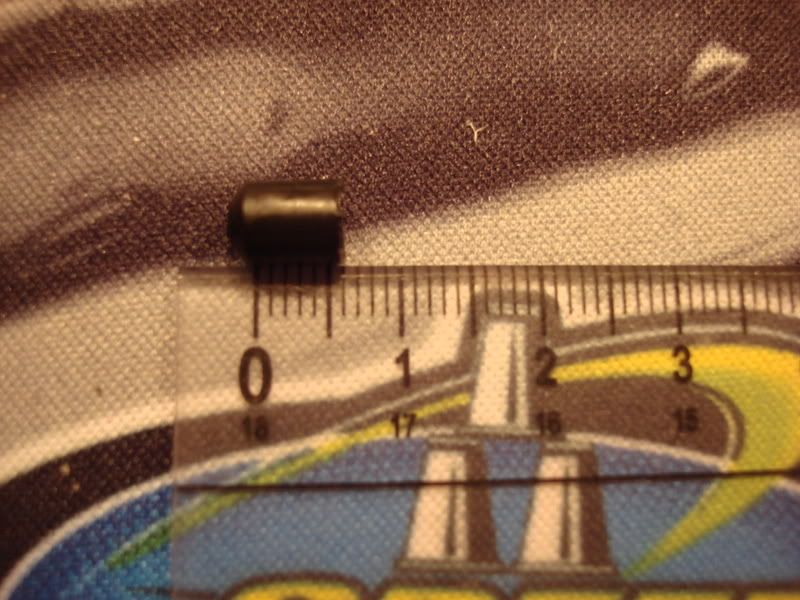
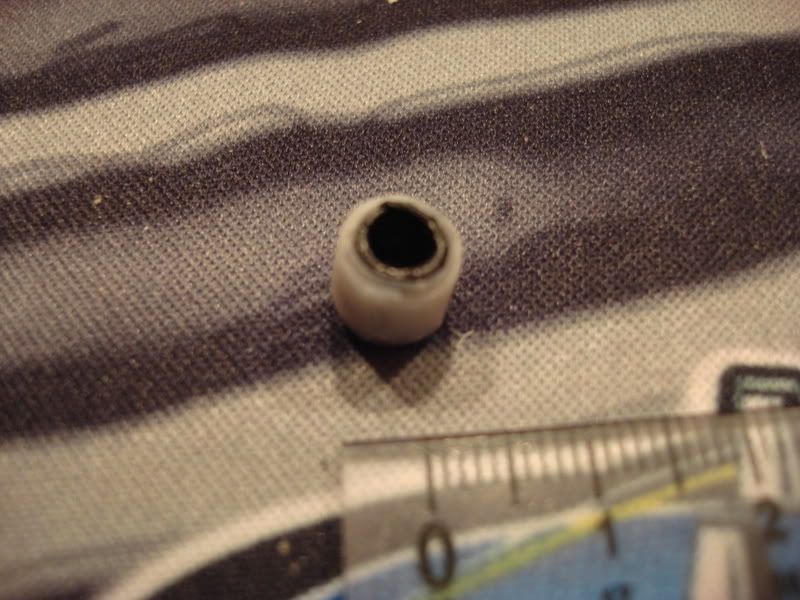
C. Pentel Hybrid Gel Grip: tip, grip, backplug
D. Pentel RSVP: everything except the cap and the ink
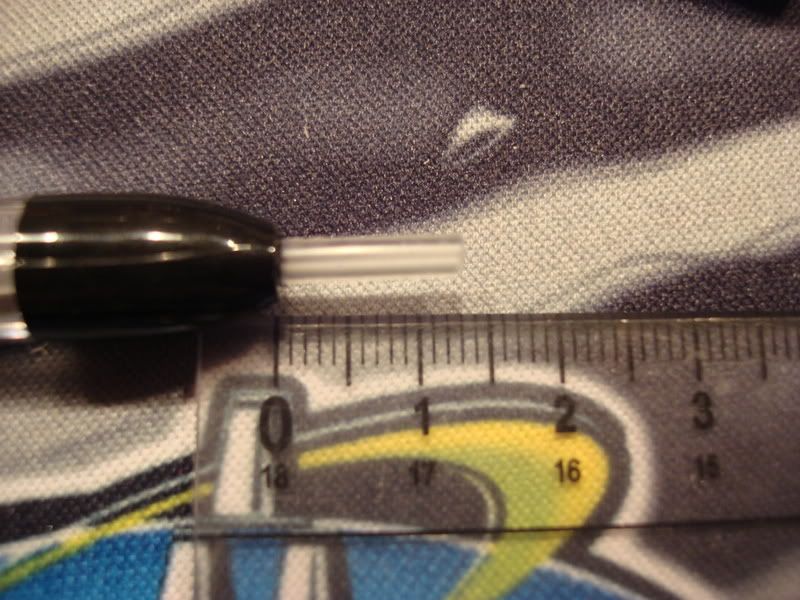
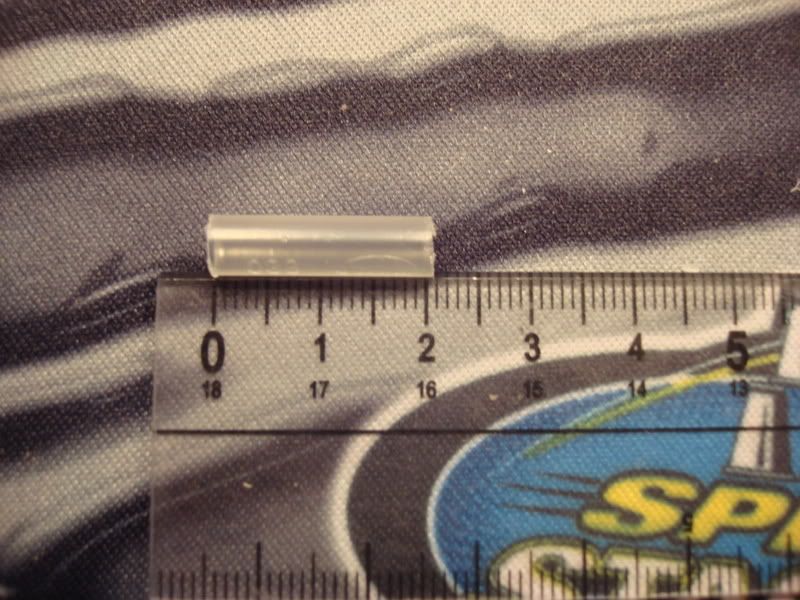
E. 2 Empty inktubes with different thicknesses. 1 rsvp inktube (no more than 4.5 cm), 1 sailor inktube (2 cm). (can use G3, G2, etc.)
Tools:
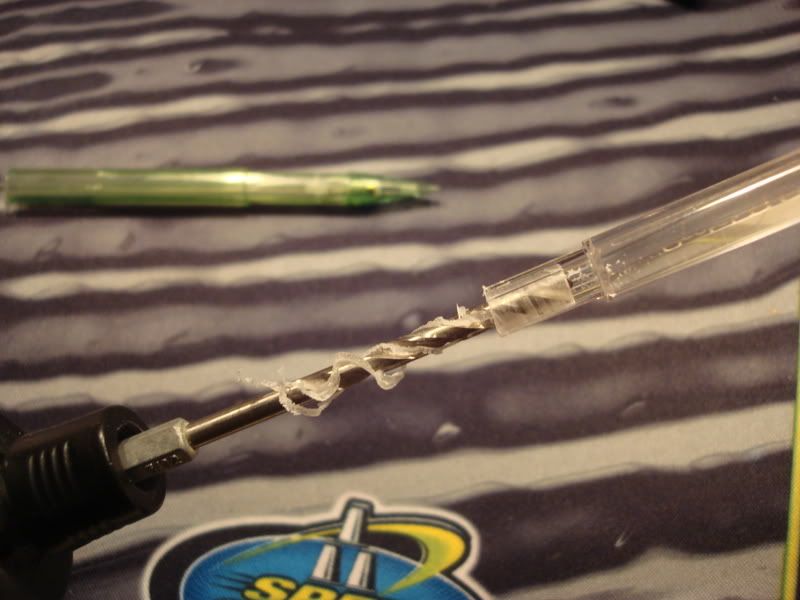
Driller with various drills
packaging tape
regular tape
scissors
x-acto
sander
teflon tape
-------------------------------------------------
Spoiler: -
Date: Thu, Feb 26 2009 01:51:18
Spoiler:
-------------------------------------------------
FAQ
Q: Can I use a dremel to cut the barrels?
A: Yea you can on the rsvp barrel, but I'm not sure on the champ barrel. Since there is an inktube inside and the plastic is very weak, I wouldn't chance it.
Q: I finished my front part, and when I click, the whole front part shoots out. What do I do?
A: You should re-tape your front part, connecting the rsvp barrel and the champ barrel with PACKAGING tape.
Q: There's rattling in the cap. What do I do?
A: The thick inktube is not flat enough and is not in contact with the HGG backplug and the end of the rtr rsvp cap. Push the rsvp grip back a LITTLE more, using a G2 back piece.
Q: My cap flies off everytime I spin!
A: Add a little more tape to the inktube so that it fits better into the HGG backplug in the cap.
Q: Can I use Pentel Icy as a sub for the champ?
A: Yes. The tips are slightly different, but they are exactly the same length. :]
Q: How do I remove ink from inktubes?
A: First, I would make sure the ink in the inktube is fairly fresh. (not ancient old, like from a random pen box in your garage) Then, yank off the metal tip with pliers. Bring it to a sink, and blow from the end without a tip to the end that had the tip.Some blobs should come out slowly; keep running water in the sink to wash off the blobs as the fall out.When you can get a slight circulation going from tip to tip (ink may still be inside the tube's lining of the walls), you can put the tube vertically into the stream of water. I would suggest using warm water, it just seems to work better for me. And dont forget to clean up!
-------------------------------------------------
Pros&Cons
Cons:- Permanent insert
- Back heavy
- No eraser

Pros- No RSVP backplug shaving AT ALL~
- Writable
- Fun to click

- Spins like an MX
- Sturdy
- Noiseless
-------------------------------------------------
And that concludes my second tutorial!
If there are any questions, feel free to ask!
Thanks for your time, and good luck if you make it! -
Date: Thu, Feb 26 2009 02:02:27
thank you thank you thank you!!! ^^ cant wait to make this
-
Date: Thu, Feb 26 2009 02:15:42
is pentel champ same as pentel icy? i have a billion of those
and I have made and failed at making mp mx's out of icy's -
Date: Thu, Feb 26 2009 02:18:52
how do you get the ink out of the rsvp ink barrel?
I tried running water though, but its to small :\ -
Date: Thu, Feb 26 2009 02:23:41QUOTE (Santa @ Feb 25 2009, 06:15 PM) <{POST_SNAPBACK}>is pentel champ same as pentel icy? i have a billion of those
Spoiler:
and I have made and failed at making mp mx's out of icy's
No, they are different; champ is all plastic tip, and icy is metal tip.
the tip lengths are the same, so you can use the icy as a sub. ^^QUOTE (xepher @ Feb 25 2009, 06:18 PM) <{POST_SNAPBACK}>how do you get the ink out of the rsvp ink barrel?
I tried running water though, but its to small :\
Hm.. yea it's a dirty task thats for sure
First, I would make sure the ink is fairly fresh. (not ancient old, like from a random pen box in your garage)
Then, yank off the metal tip with pliers.
Bring it to a sink, and blow from the end without a tip to the end that had the tip.
Some blobs should come out slowly; keep running water in the sink to wash off the blobs as the fall out.
When you can get a slight circulation going from tip to tip (ink may still be inside the tube's lining of the walls), you can put the tube vertically into the stream of water.
I would suggest using warm water, it just seems to work better for me.
and dont forget to clean up your mess!
-
Date: Thu, Feb 26 2009 02:23:41
nice
 i also used a pen like this to make my first mx except mine doesnt click well lol
 -
Date: Thu, Feb 26 2009 04:02:03
I don't think the thick inktube -> RSVP Grip -> HGG backplug part is necessary because the HGG backplug can only go up so much in the rsvp cap. Therefore, you should only just need the HGG back plug.
Good tutorial though. Gonna start making these once I run out of MSPs. -
Date: Thu, Feb 26 2009 04:07:14QUOTE (iamk34n3 @ Feb 25 2009, 08:02 PM) <{POST_SNAPBACK}>I don't think the thick inktube -> RSVP Grip -> HGG backplug part is necessary because the HGG backplug can only go up so much in the rsvp cap. Therefore, you should only just need the HGG back plug.
Good tutorial though. Gonna start making these once I run out of MSPs.
Oh, but it IS necessary!
The main reason my version is different is because it uses the rsvp rtr cap in the back, making clicking more efficient.
This is because the diameter of the rsvp rtr cap is wider, therefore the excessive taping of the hgg backplug to widen it and prevent the rsvp grip from slipping out.
Thanks for feedback! -
Date: Thu, Feb 26 2009 04:10:33
Oh man.
 I totally forgot that you used a retractable rsvp cap. So no shaving of the backplug is required huh? Even if its a super thick black one?
 -
Date: Thu, Feb 26 2009 04:12:52QUOTE (iamk34n3 @ Feb 25 2009, 08:10 PM) <{POST_SNAPBACK}>Oh man. I totally forgot that you used a retractable rsvp cap. So no shaving of the backplug is required huh? Even if its a super thick black one?
Yep!
Thats why I LOVE it!
-
Date: Thu, Feb 26 2009 04:21:14QUOTE (テoh! @ Feb 25 2009, 06:02 PM) <{POST_SNAPBACK}>thank you thank you thank you!!! ^^ cant wait to make this
-
Date: Thu, Feb 26 2009 08:51:26QUOTE (dori @ Feb 25 2009, 11:07 PM) <{POST_SNAPBACK}>Oh, but it IS necessary!
The main reason my version is different is because it uses the rsvp rtr cap in the back, making clicking more efficient.
This is because the diameter of the rsvp rtr cap is wider, therefore the excessive taping of the hgg backplug to widen it and prevent the rsvp grip from slipping out.
Thanks for feedback!
seems like a really good msp sub
the retr rsvp cap is a bit wobby tho...its just a little bit too big.
well anyways nice tut. good jobQUOTE (iamk34n3 @ Feb 25 2009, 11:10 PM) <{POST_SNAPBACK}>Even if its a super thick black one?
oh geez keane.....lol -
Date: Thu, Feb 26 2009 16:01:27
What I've to change to done this mod with normal RSVP cap?
because I really can't get the retractable one T T -
Date: Fri, Feb 27 2009 00:40:38QUOTE (iamk34n3 @ Feb 25 2009, 08:10 PM) <{POST_SNAPBACK}>Even if its a super thick black one?QUOTE (TEK @ Feb 26 2009, 12:51 AM) <{POST_SNAPBACK}>oh geez keane.....lol

I dont see why you dont expect this to be approved, the tuts very good. The drilling is the only thing that bothers me about this mod, otherwise id make it. -
Date: Fri, Feb 27 2009 00:42:47QUOTE (longhorn @ Feb 26 2009, 10:01 AM) <{POST_SNAPBACK}>What I've to change to done this mod with normal RSVP cap?
because I really can't get the retractable one T T
You would have to shave down the RSVP backcap, then... -
Date: Fri, Feb 27 2009 01:37:55
thxs so much
-
Date: Fri, Feb 27 2009 02:04:42
how did yours get such a loud "clicky" sound?
mine sounds like a regular mech. pencil
but ty for tutorial ^^
very nice mod -
Date: Fri, Feb 27 2009 03:12:42QUOTE (pholord @ Feb 26 2009, 04:40 PM) <{POST_SNAPBACK}>I dont see why you dont expect this to be approved, the tuts very good. The drilling is the only thing that bothers me about this mod, otherwise id make it.
:] it would be nice if it was approved.
yea.. the drilling was a main concern for me too, but if your drill is fully charged, it shouldnt take longer than a few seconds!QUOTE (xepher @ Feb 26 2009, 06:04 PM) <{POST_SNAPBACK}>how did yours get such a loud "clicky" sound?
mine sounds like a regular mech. pencil
but ty for tutorial ^^
very nice mod
does the mech click as loud if you click it without the cap? (push the inktube only)
cuz if it does, then the cap is the problem (the cap isnt moving smooth enough, you'll have to shave the rsvp backplug a bit)
if it doesnt, then there is something wrong with the front mechanism.
-
Date: Fri, Feb 27 2009 03:27:45QUOTE (pholord @ Feb 26 2009, 07:40 PM) <{POST_SNAPBACK}>
I dont see why you dont expect this to be approved, the tuts very good. The drilling is the only thing that bothers me about this mod, otherwise id make it.
drilling is very easy actually if you use a dremel with an orb like drilling/grinding tool. just set it on low and push it down the rsvp body slowly. i reccomend holding you're breath though, this thing makes a lot of dust -
Date: Sat, Feb 28 2009 16:44:51
do you have any tricks to cut Champ?
I have broke it one - - -
Date: Sun, Mar 1 2009 00:24:15QUOTE (longhorn @ Feb 28 2009, 08:44 AM) <{POST_SNAPBACK}>do you have any tricks to cut Champ?
I have broke it one - -
Yea... it breaks easily :\
Umm I usually write (the line) it over with an x-acto knife, and later I saw it with one side of a scissor.
It takes a while, but it's safe and it works.
Or, if you have a hand saw, that would work best!
-
Date: Sun, Mar 1 2009 14:45:25
I made it and I lost two rsvo body while I use driller - -
anyway I can't get rsvp ret. cap so I use Hyper jell cap but still nice ^^ -
Date: Sun, Mar 1 2009 15:14:18
THIS PEN IS GENIUS
Must make -
Date: Thu, Mar 5 2009 12:04:24QUOTE (longhorn @ Mar 1 2009, 09:45 PM) <{POST_SNAPBACK}>I made it and I lost two rsvo body while I use driller - -
anyway I can't get rsvp ret. cap so I use Hyper jell cap but still nice ^^
in thailand we have a retr. cap sub, its exactly the same, you can buy it at a nanmee bookstore, pm me for me details
Hyperjell Cap? how does that work -
Date: Thu, Mar 5 2009 20:57:24
Lol, I saw my insert so I decided to make one
Thanks for the tutorial, it was very helpful -
Date: Fri, Mar 13 2009 01:46:48
alright, i made one, and all i can say is that IT IS AWESOME!!! the clicking has a good sound, it was fairly simple to make, and i modified it so i can change the insert without retaping
nice job -
Date: Fri, Mar 13 2009 03:43:00
This mod is really good! Everything is very stable, and it works like a charm! Thanks Dori!
-
Date: Sat, Mar 21 2009 04:36:36
 Amazing mod, Dori
 -
Date: Thu, Mar 26 2009 11:44:51
nice mod. quite easy to make!
-
Date: Mon, Mar 30 2009 23:54:06
thanks for the parts, Dori!
I'd just like to add that instead of using the HGG backplug, RSVP grip and extra ink tube, I put some tape around a section of a Supertip cap, and that worked fine. If you want, you can try this, but then it's not really a RSVP MX anymore, right? -
Date: Mon, Apr 27 2009 14:19:32
Sorry for reviving this thread but is there any possibilty to put this mechanism in the MSXA? Should the 'inktube' be extended or something like that? And should the comssa cap be drilled?

-
Date: Wed, Apr 29 2009 02:34:06QUOTE (Outsmash @ Apr 27 2009, 07:19 AM) <{POST_SNAPBACK}>Sorry for reviving this thread but is there any possibilty to put this mechanism in the MSXA? Should the 'inktube' be extended or something like that? And should the comssa cap be drilled?
Lol I'm pretty sure its impossible to fit the champ mechanism (tip) inside a comssa cap (of an msxa). This is because the comssa cap is not wide enough to fit the tip. if you desire the tip above the comssa cap, the hgg tip would not reach low enough to attach to the comssa cap.
Confusing? Definitely.
But basically, I wouldn't recommend doing it.
I can suggest another way to make a msxa mp though; try using my mp namae method (tut in my sig).
It uses the mechanism similar to the mp mx v3, which is thinner so it can go through the comssa cap easier, while allowing the hgg tip to stay on the comssa cap.
I could do a tut if necessary (because it's quite simple); I've done it with my msxa and its quite stable.
-
Date: Wed, Apr 29 2009 10:41:48
dori, make a tut on that mp mxsa please.
-
Date: Thu, Apr 30 2009 02:00:36
does pental have .5 mech pencils that could be subbed in for the mech pencil that is used
-
Date: Thu, Apr 30 2009 02:08:58QUOTE (dori @ Apr 28 2009, 10:34 PM) <{POST_SNAPBACK}>Lol I'm pretty sure its impossible to fit the champ mechanism (tip) inside a comssa cap (of an msxa). This is because the comssa cap is not wide enough to fit the tip. if you desire the tip above the comssa cap, the hgg tip would not reach low enough to attach to the comssa cap.
Confusing? Definitely.
But basically, I wouldn't recommend doing it.
I can suggest another way to make a msxa mp though; try using my mp namae method (tut in my sig).
It uses the mechanism similar to the mp mx v3, which is thinner so it can go through the comssa cap easier, while allowing the hgg tip to stay on the comssa cap.
I could do a tut if necessary (because it's quite simple); I've done it with my msxa and its quite stable.
erm.. i dont mean to be an arrogant jerk or anything, but couldnt you do it the same way you do a mp comssa ? -
Date: Thu, Apr 30 2009 02:33:44QUOTE (sifihog @ Apr 29 2009, 07:08 PM) <{POST_SNAPBACK}>erm.. i dont mean to be an arrogant jerk or anything, but couldnt you do it the same way you do a mp comssa ?
Hmm, come to think of it, that is quite possible!
Wow, I did not even realize that until now... XD
Good find!
The only difference woudl be that the G2 plastic part would need to be extended to be taped to the rsvp body.
If done correctly, I should think it should be as stable as the mp metallic comssa!
-
Date: Thu, Apr 30 2009 02:38:47QUOTE (dori @ Apr 29 2009, 10:33 PM) <{POST_SNAPBACK}>Hmm, come to think of it, that is quite possible!
Wow, I did not even realize that until now... XD
Good find!
The only difference woudl be that the G2 plastic part would need to be extended to be taped to the rsvp body.
If done correctly, I should think it should be as stable as the mp metallic comssa!
Thank you, this is what i did.
-
Date: Fri, Nov 6 2009 03:05:27
This is my main method for making MP MX's, although I use my own cap method...
I don't understand why the insert is permanent... -
Date: Fri, Nov 20 2009 07:46:21QUOTE (Nation @ Nov 5 2009, 07:05 PM) <{POST_SNAPBACK}>
This is my main method for making MP MX's, although I use my own cap method...
I don't understand why the insert is permanent...
cause you'd have to remove tons of tape? -
Date: Fri, Dec 4 2009 21:34:18QUOTE (Colin @ Nov 20 2009, 02:46 AM) <{POST_SNAPBACK}>cause you'd have to remove tons of tape?
I see. -
Date: Wed, Jan 6 2010 21:52:50
Hmm, stead of wrapping the inktube w/ tape im going to try top hollow out an eraser.
-
Date: Mon, Mar 22 2010 20:31:28
Ok, I found out why some Icy's/Champ's click louder than others.
There is an old version, and a new version.
The old version has a metal clip that is attached to the body, and it has an RSVP like grip.
The new version has a shitty grip that rips really easily, and it has a metal clip that is attached to the eraser part.
Anyway, the old kind clicks a LOT louder. so meh. -
Date: Mon, Mar 22 2010 20:37:10
http://www.viewpoints.com/images/review/20...4-0901_full.jpg old icy
vs.
http://content.etilize.com/Large/11966710.jpg new icy
Just in case anyone was wondering.
EDIT: Nation, do both mechs work for the mod? -
Date: Mon, Mar 22 2010 20:40:34
yes. ._.
-
Date: Tue, Mar 23 2010 01:05:57QUOTE (Nation @ Mar 22 2010, 01:31 PM) <{POST_SNAPBACK}>Ok, I found out why some Icy's/Champ's click louder than others.
There is an old version, and a new version.
The old version has a metal clip that is attached to the body, and it has an RSVP like grip.
The new version has a shitty grip that rips really easily, and it has a metal clip that is attached to the eraser part.
Anyway, the old kind clicks a LOT louder. so meh.
Theyre both the same.
Its how much the inktube is affected. If you yank/mess around with it alot, it'll fuck up the sound.
The old Icy's have an MP mech like a dr.grip, where as the new ones have one whole attached mech. -
Date: Thu, Mar 25 2010 20:26:33QUOTE (Colin @ Mar 22 2010, 08:05 PM) <{POST_SNAPBACK}>Theyre both the same.
Its how much the inktube is affected. If you yank/mess around with it alot, it'll fuck up the sound.
The old Icy's have an MP mech like a dr.grip, where as the new ones have one whole attached mech.
these were both bought straight from the store... (different stores thought)