UPSB v3
Approved Tutorials / Guitrum's Retractable MX
Tutorial by: Guitrum
-
Date: Fri, Oct 30 2009 23:39:05
back by popular demand:
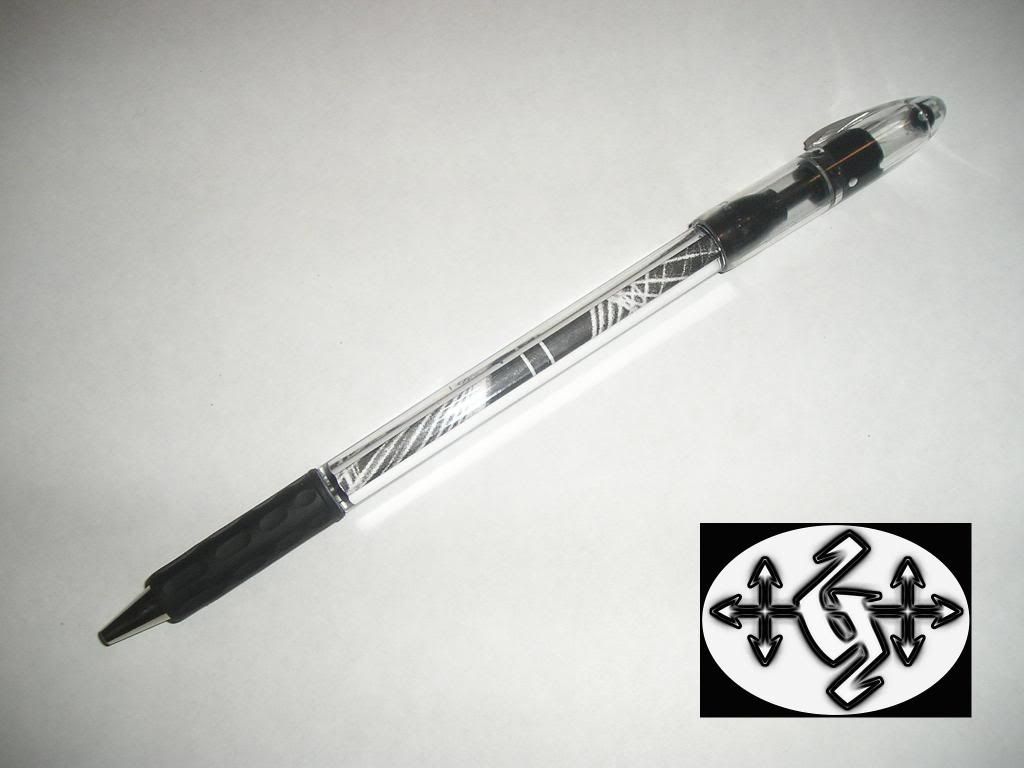
Guitrum's Retractable MX Tutorial
~
~
For those who need help dismantling a bic mechanism.
~
[Stats]:
[Balance]: Backheavy (just like a real mx)
[Length]: 18.5cm (just like a real mx)
[Cost]: $4-$5 USD
[Inktype]: RSVP ink
[Style]: Single-Sided, Retractable
[Difficulty]: Medium~Hard
~
[Materials]: (click)
[1x]: Pentel RSVP
[1x]: Pentel Hybrid Gel Grip
[1x]: BIC Clic Stic
~
[Tutorial]:
1)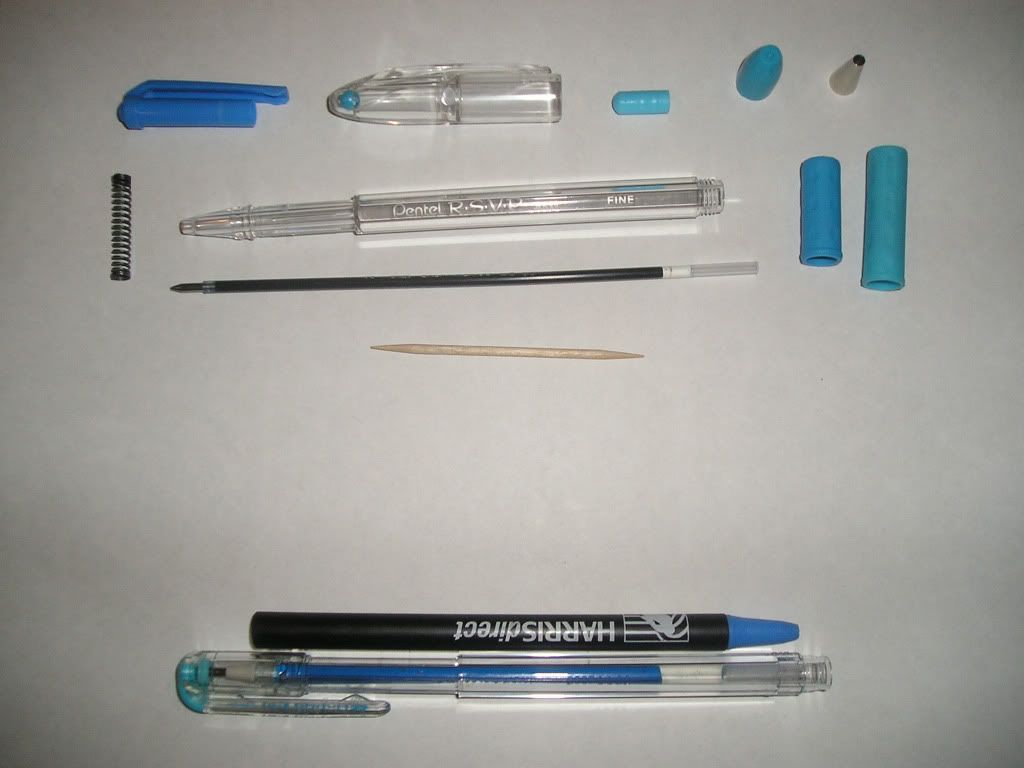
Disassemble the pens so that you have what is shown. Discard what is on the bottom and keep what is on the top.
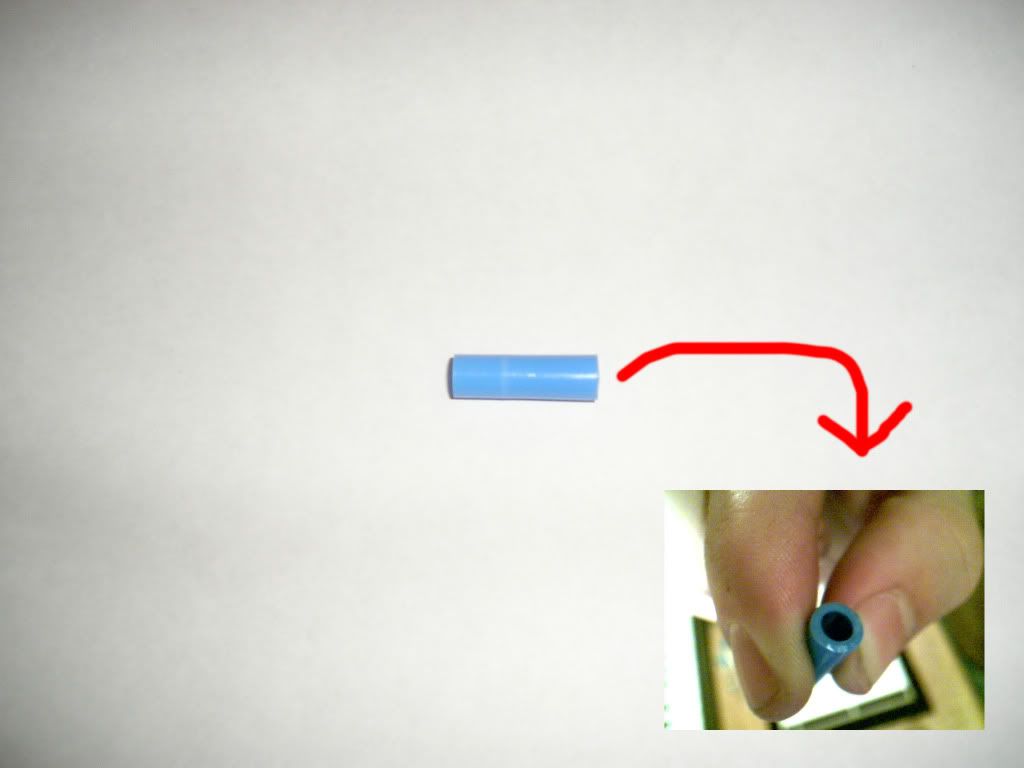
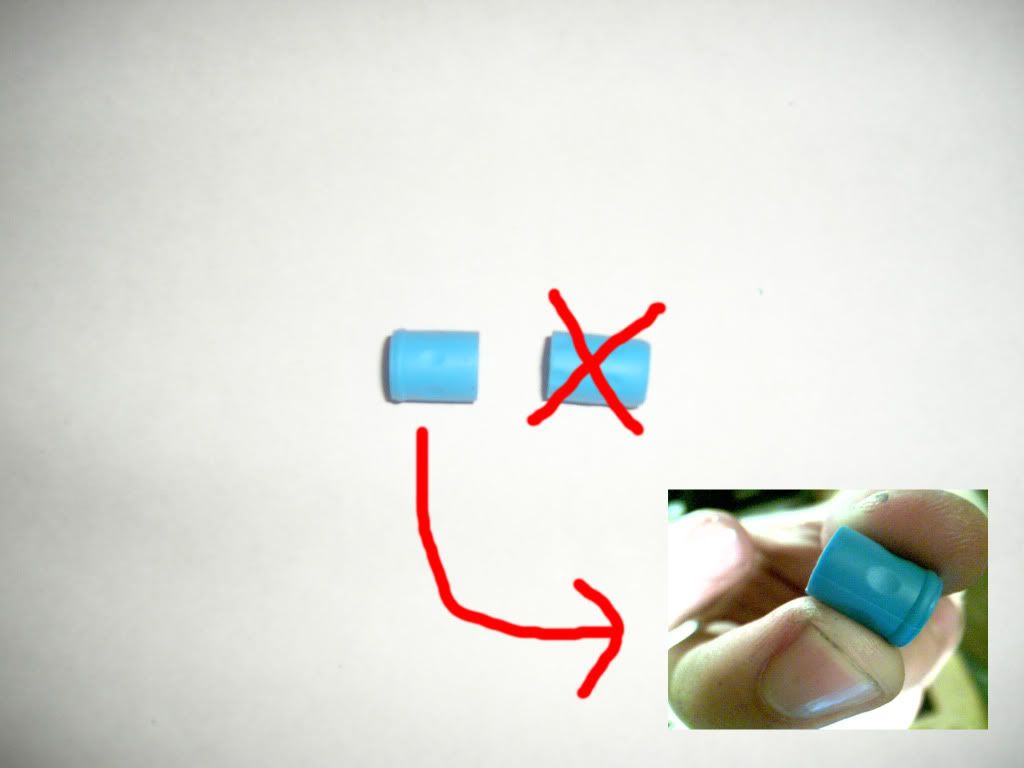
2)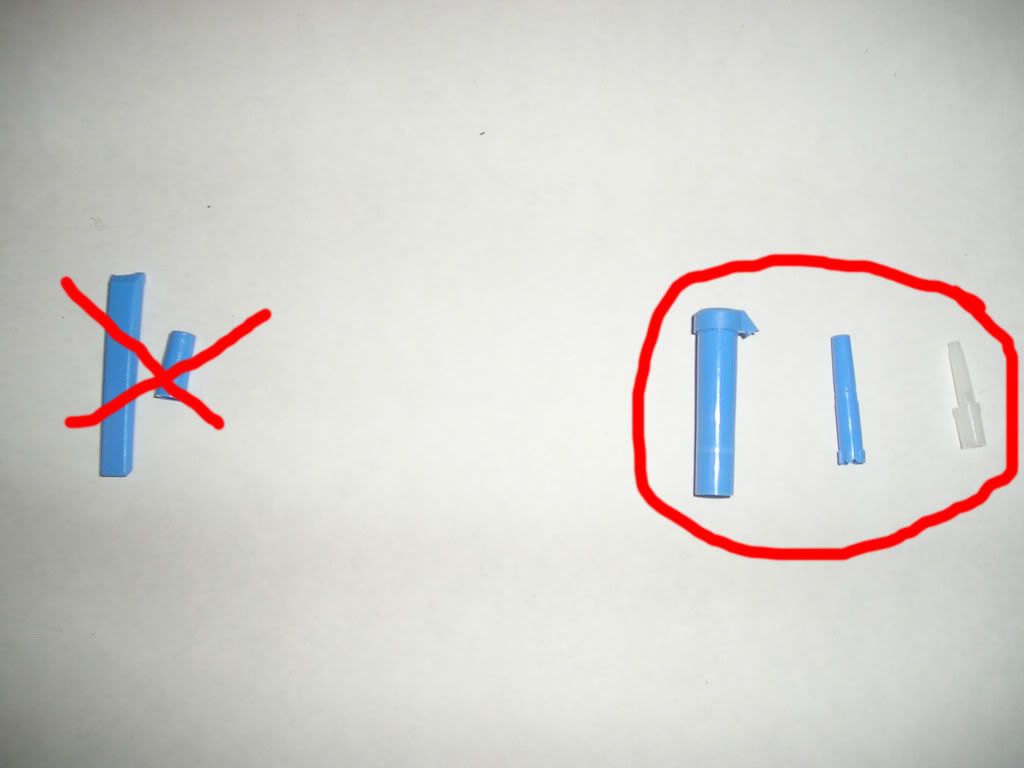
Disassemble the BIC Clic Stic mechanism to have what is shown. Discard what is on the right and keep what is on the left.
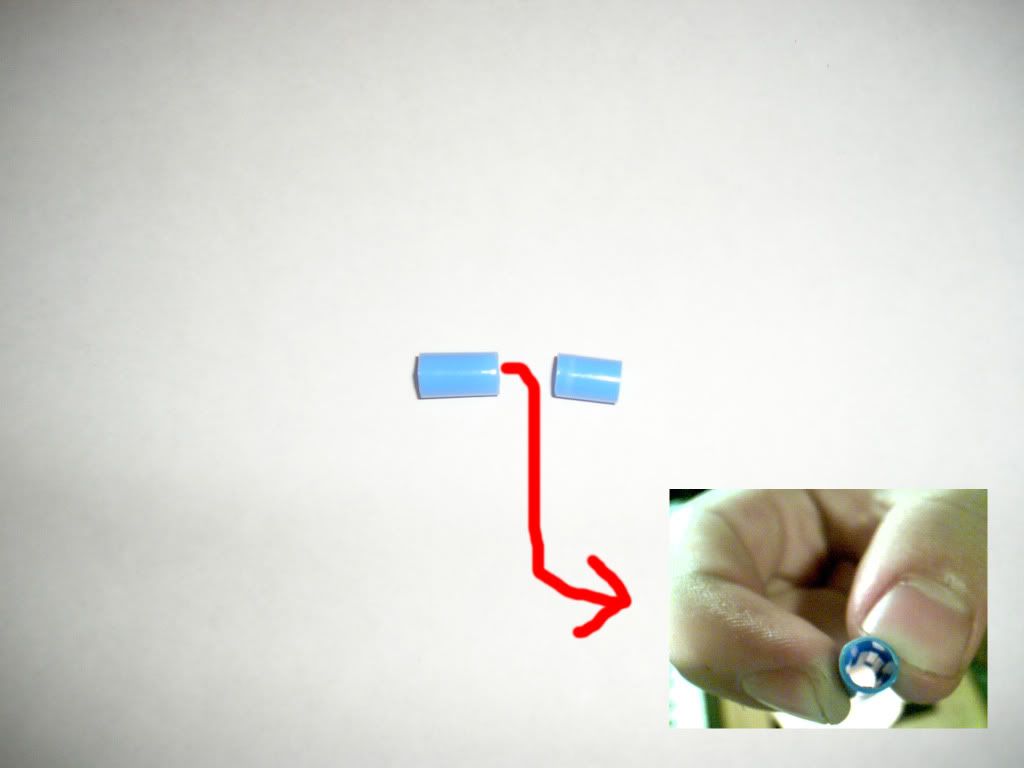
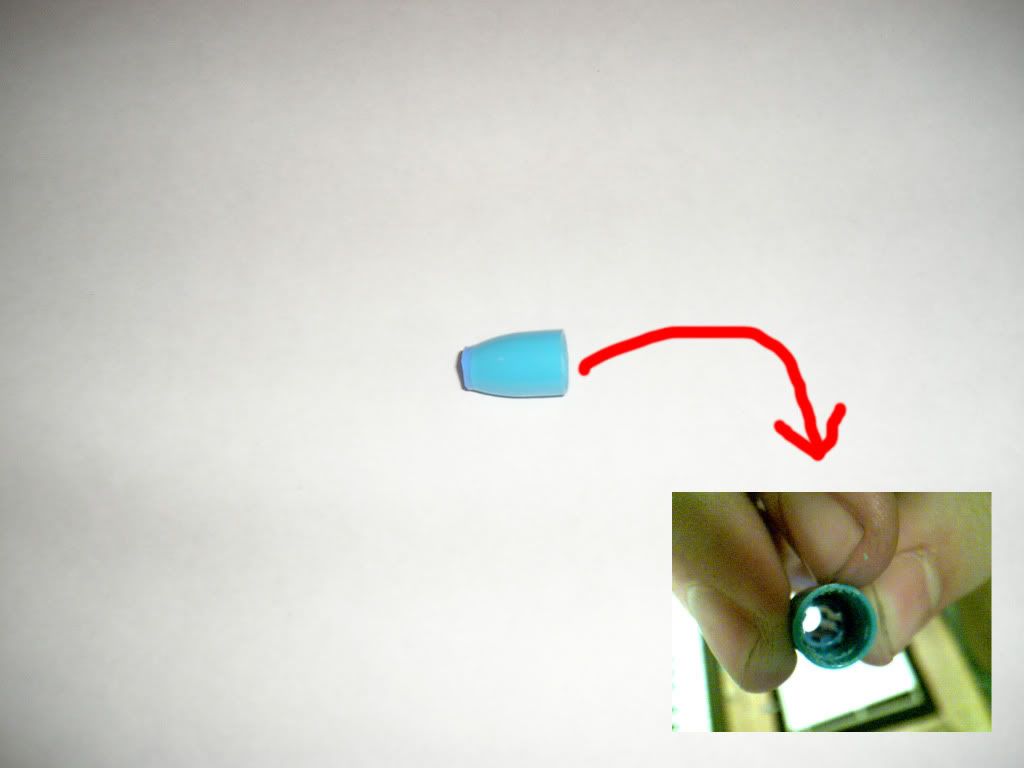
3)
Cut off the top of the BIC mechanism just enough so you can see the ridge on the inside.
4)
Cut away right up until you meet that ridge like shown.
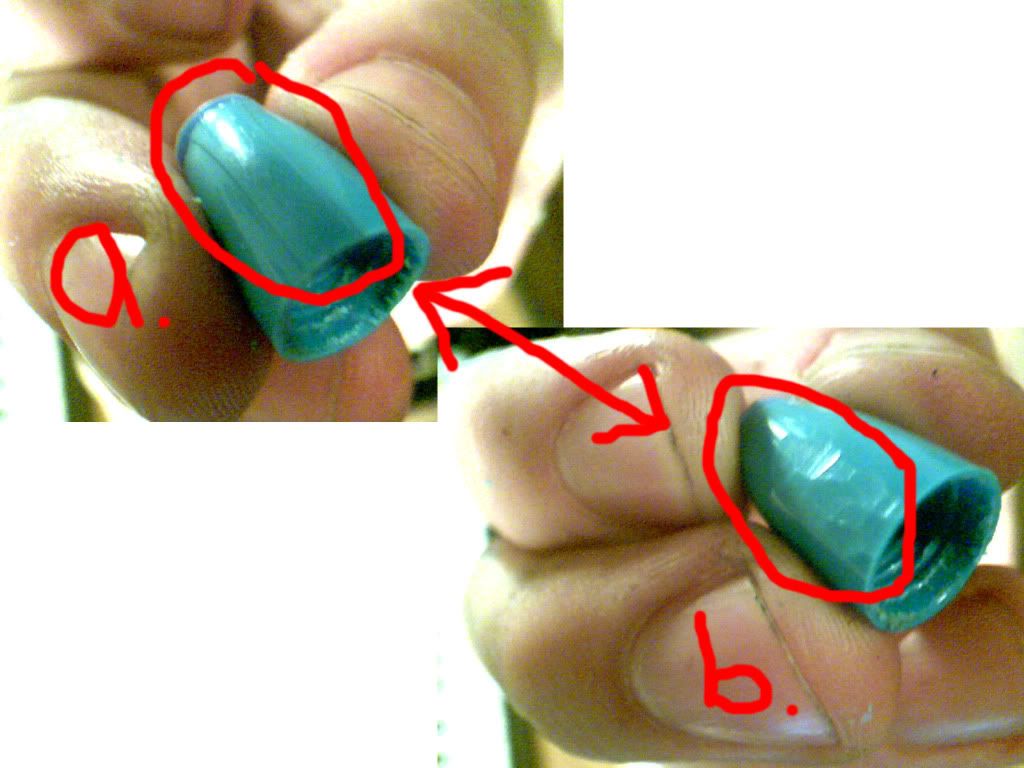
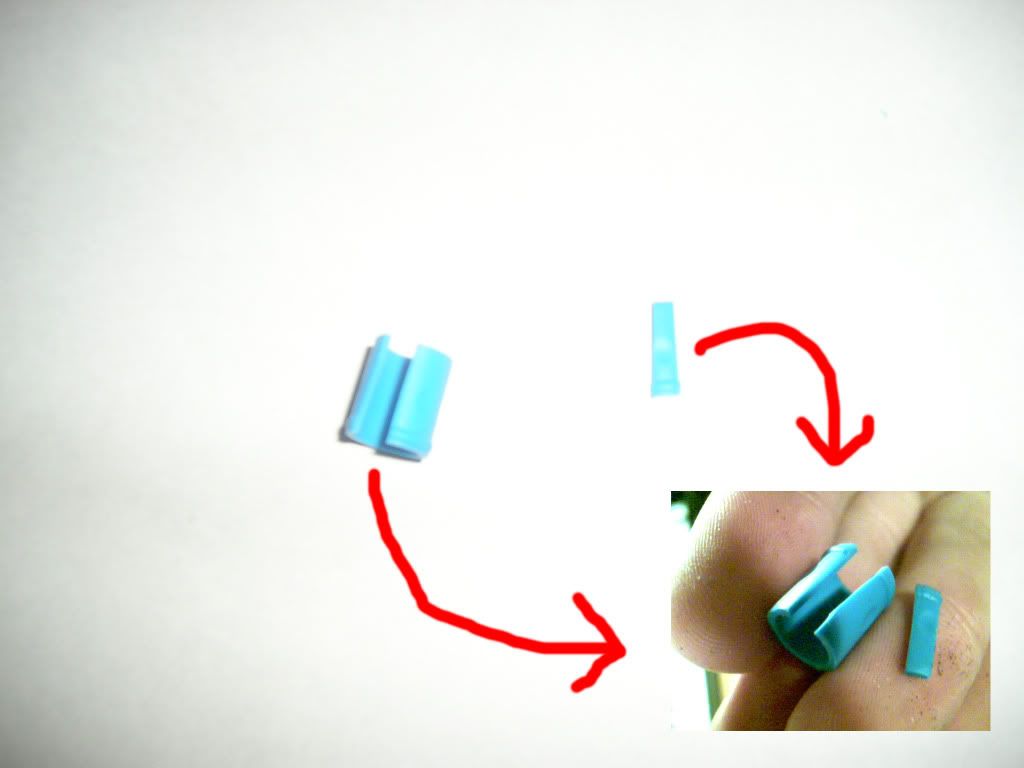
5)
Cut off the bottom of the BIC mechanism just enough so you can see the inner teeth on the inside.
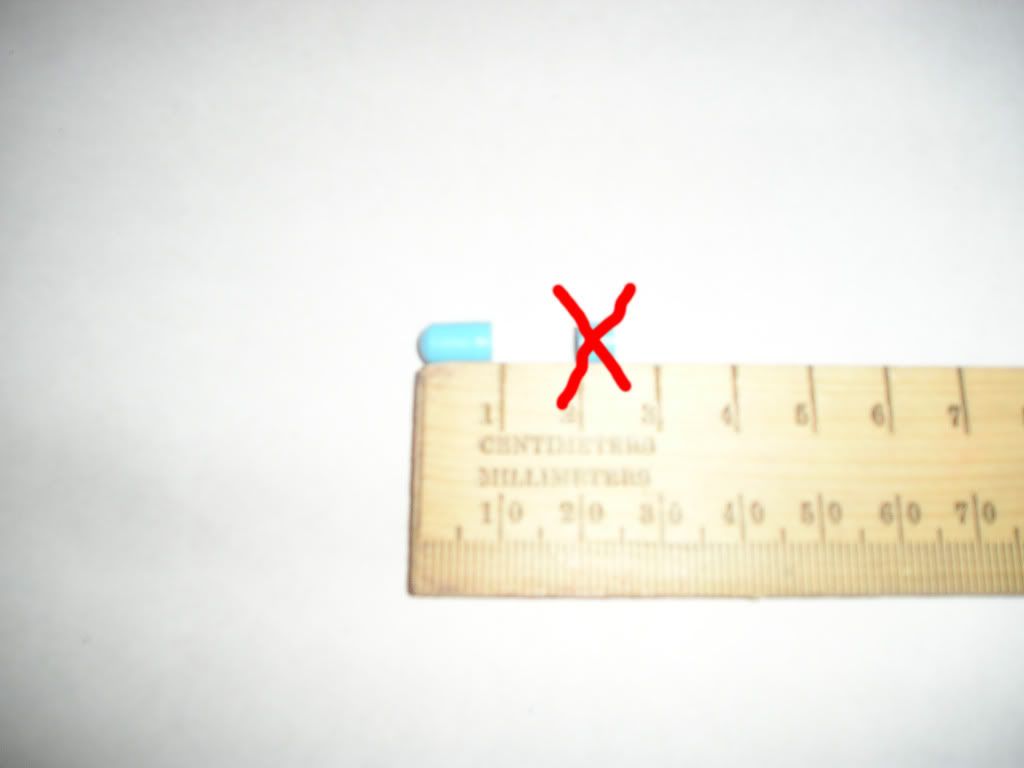
6)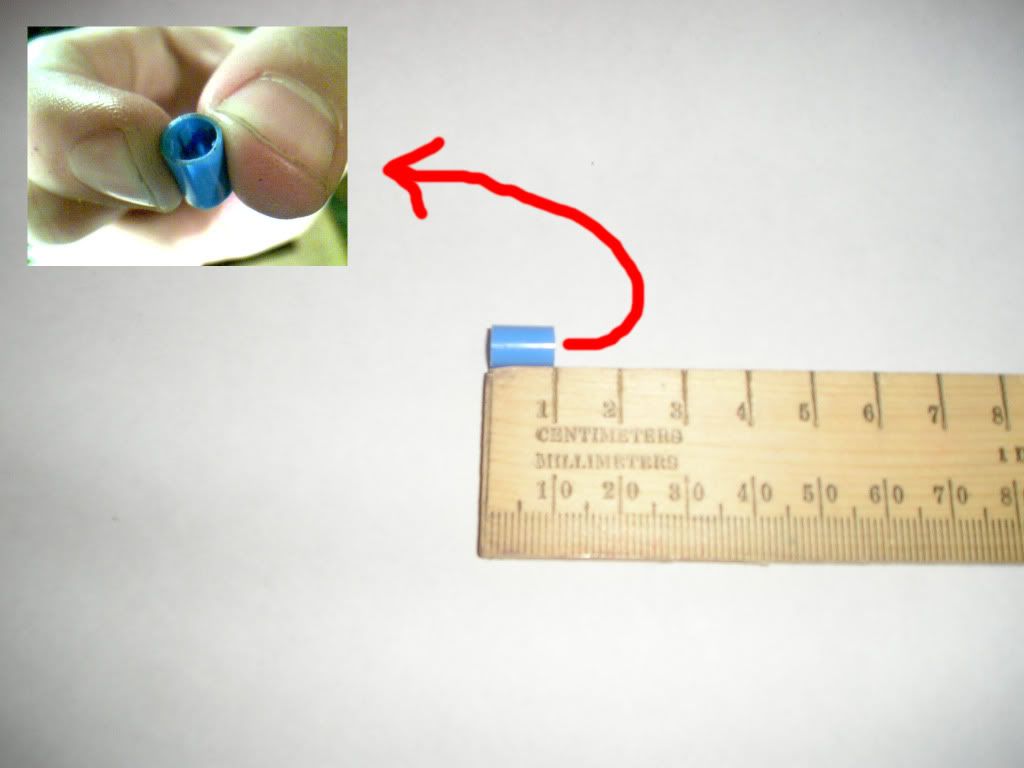
Cut away right up until there is a tiny bit of space beneath the teeth. The final product is about 1cm long.
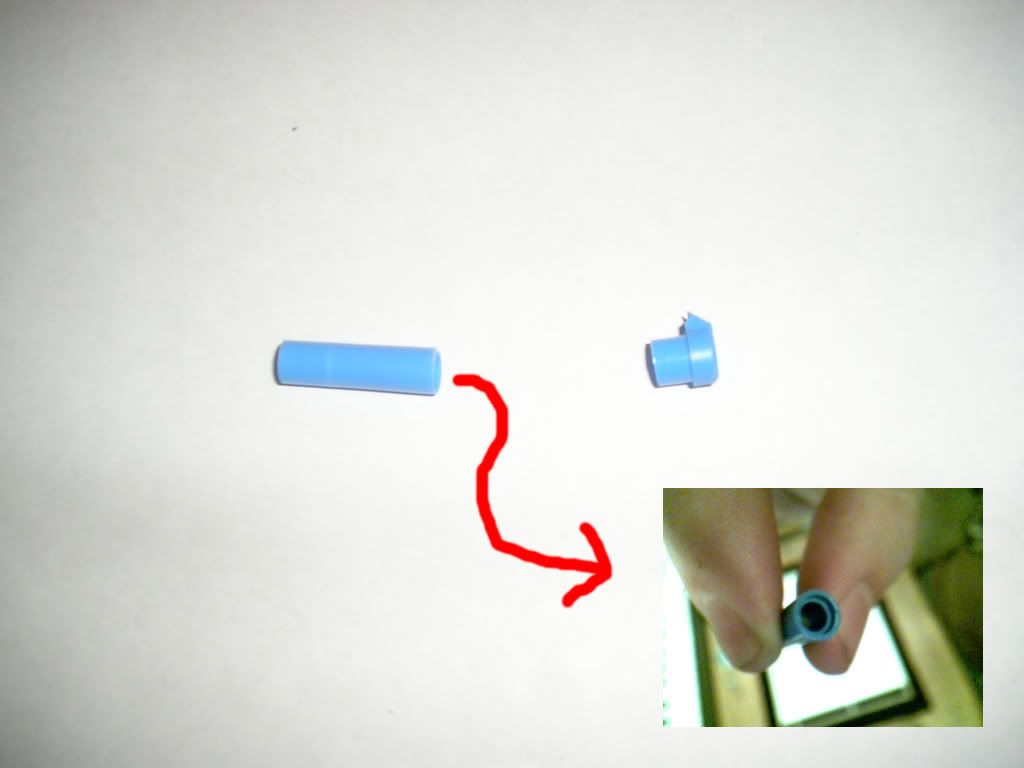
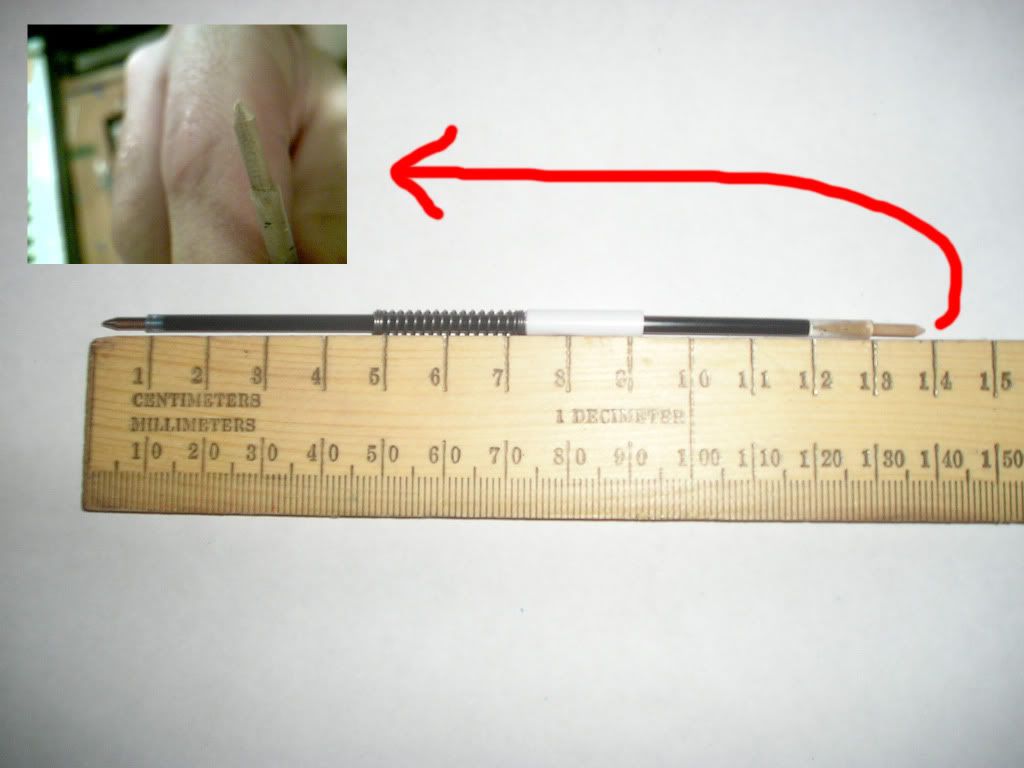
7)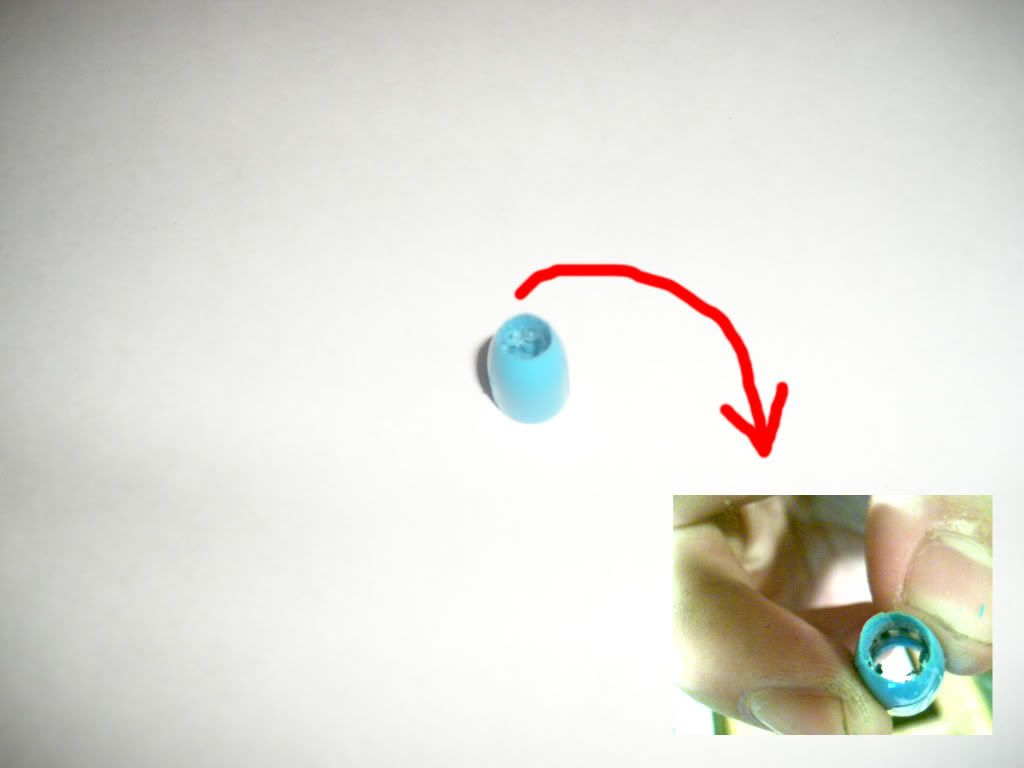
Bore out a hole in the RSVP backcap like shown.
8)
Push the cut BIC mechanism inside the RSVP backcap and make sure that it is SNUG. Add superglue if necessary.
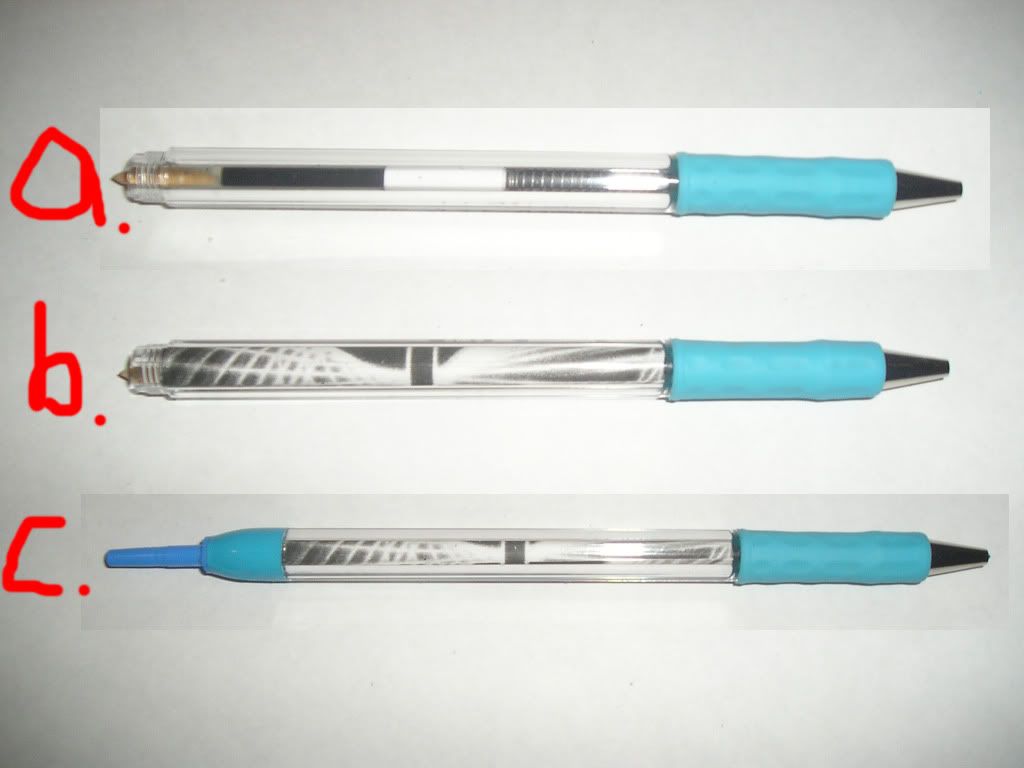
9)
a) Cut off the tip of the RSVP body just enough so the RSVP inktube can slide all the way through.
b ) Screw on the Hybrid Gel Grip tip to the tip of the RSVP body.
c) Push on the Hybrid Gel Grip grip over everything.
TUTORIAL CONTINUES ONTO NEXT POST ---> -
Date: Fri, Oct 30 2009 23:41:33
10)
Shave off the ridges on each side of the RSVP backcap. (so the cap can slide up and down smoothly)
11)
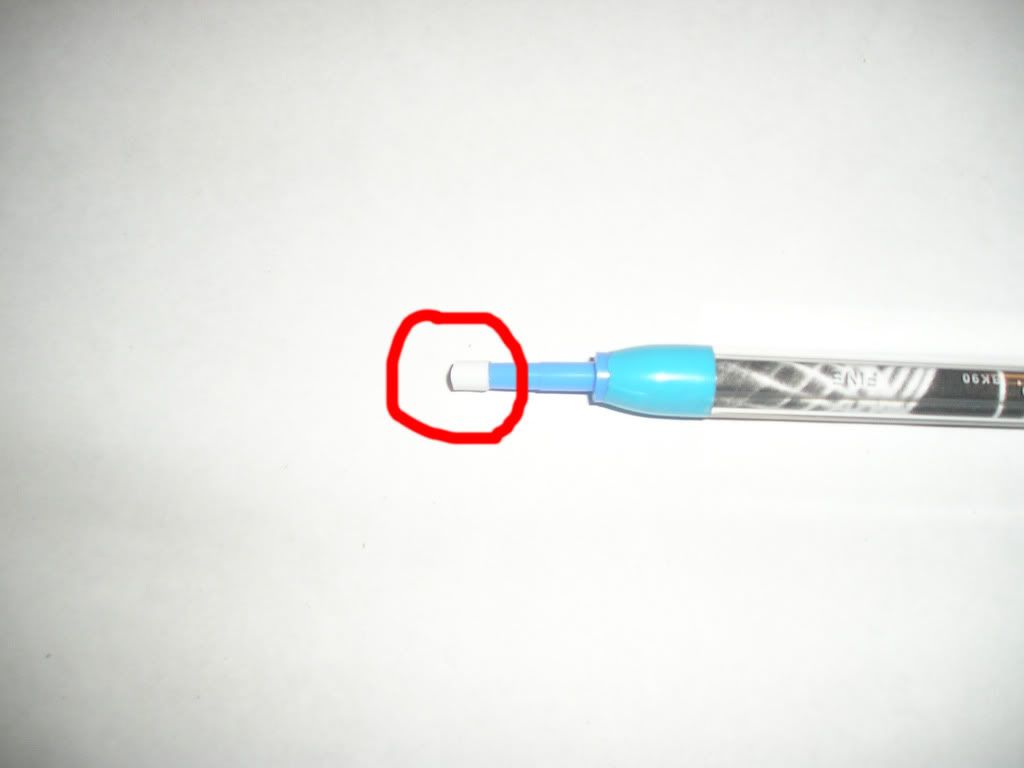
Modify the RSVP inktube like so. (this could vary from person to person so measurements are not exact)
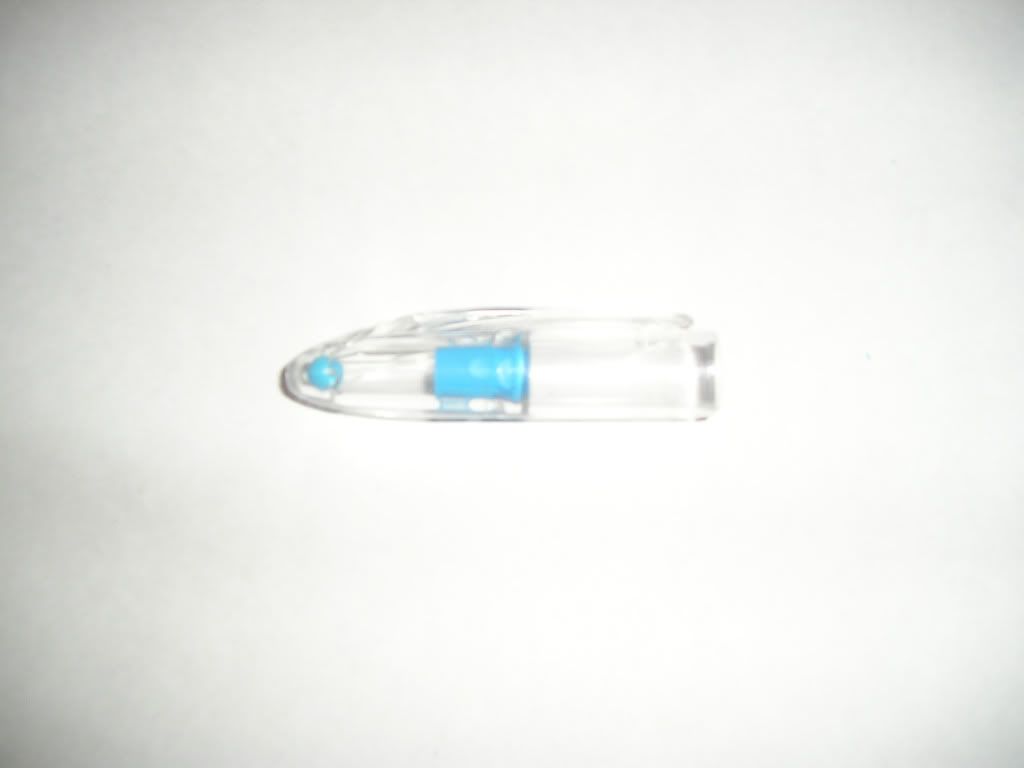
12)
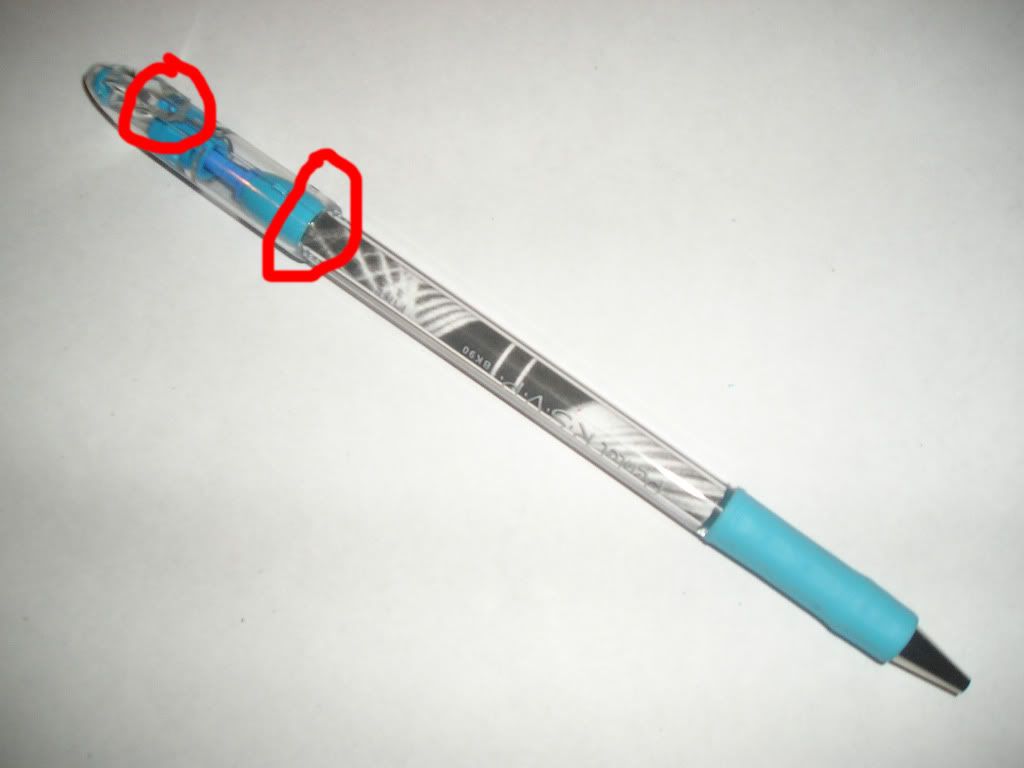
a) Put the insert in the RSVP body.
b ) Put the modified inktube in the RSVP body.
c) Screw on the RSVP backcap. (make sure the toothpick is centered in the white mechanism piece)
13)
Cut the RSVP grip like shown.
14)
Cut out a vertical strip of the RSVP grip (the portion with the ring) the width of one of the dimples.
15)
Put the cut grip into the RSVP cap and like shown.
16)
Cut the Hybrid Gel Grip backplug like shown.
17)
Push the cut backplug into the RSVP grip that is in the RSVP cap.
18)
Wrap tape around the end of the BIC mechanism like shown.
19)
Push the RSVP cap on so it meets with the base of the RSVP backcap and so it clicks properly.
Congratulations, you just made Guitrum's Retractable MX!
~
Questions and Comments are welcome
-
Date: Fri, Oct 30 2009 23:49:30
I made this right before the blackout.
So clean. Great Job. -
Date: Sat, Oct 31 2009 00:15:03
Looks pretty cool. I can't wait to make one. But after you get the back piece of the click stick off, how did you take it apart so that you have all the pieces shown in step 2?
-
Date: Sat, Oct 31 2009 20:09:29
i added a video on how to dismantle the bic mechanism. also a video showing how it retracts n spins
-
Date: Sun, Nov 1 2009 00:03:55
pretty nice pen
the hallowing out of the rsvp back cap was a bitch thow -
Date: Sun, Nov 1 2009 09:21:51
What did you use to bore out the rsvp back cap with?
-
Date: Sun, Nov 1 2009 10:54:41
Very nice tutorial and a very nice pen
With only one little flaw, correct me if I'm wrong, but in step two: "Discard what is on the right and keep what is on the left." - I think it should be, according to the picture, conversely -
Date: Sun, Nov 1 2009 18:11:36
Getting the backcap correctly is definately the only hard part of this mid.
Any ideas on how to get it perfect?
I think that you should clarify this step more, include A LOT more pictures, and show dimensions. -
Date: Sun, Nov 1 2009 18:16:11QUOTE (Stevieboy7 @ Nov 1 2009, 10:11 AM) <{POST_SNAPBACK}>Getting the backcap correctly is definately the only hard part of this mid.
Any ideas on how to get it perfect?
I think that you should clarify this step more, include A LOT more pictures, and show dimensions.
please? D:
I like driled it to the point where the backcap was like, completely unusable :\ -
Date: Sun, Nov 1 2009 18:24:47QUOTE (Stevieboy7 @ Nov 1 2009, 11:11 AM) <{POST_SNAPBACK}>Getting the backcap correctly is definately the only hard part of this mid.
Any ideas on how to get it perfect?
I think that you should clarify this step more, include A LOT more pictures, and show dimensions.QUOTE (Colin @ Nov 1 2009, 11:16 AM) <{POST_SNAPBACK}>please? D:
I like driled it to the point where the backcap was like, completely unusable :\
Uh. i just kept going at it with drill bits. But an easier way would be to cut the very top off of the back cap and the bore the insides till the mech fits. -
Date: Sun, Nov 1 2009 19:10:15QUOTE (ION @ Nov 1 2009, 01:24 PM) <{POST_SNAPBACK}>Uh. i just kept going at it with drill bits. But an easier way would be to cut the very top off of the back cap and the bore the insides till the mech fits.
the actual drilling part is easy...
its just getting the correct size/shape thats insanely difficult.
A picture of a backcap with cut dimensions would be the best. -
Date: Sun, Nov 1 2009 19:21:14
there is no dimensions or measuring for this step theres no way to tell when to stop at the perfect moment.
the trick is to drill then try to shove the piece in. then drill a bit more then try to shove the piece in. keep doing this until it goes in. if you do it that way, its VERY snug.
the worst thing to do is to over drill. that makes the hole too big and then you have to use superglue and that is a fickle bitch...
but for me, i just made a starter hole by twisting an exacto knife then used my really small circular file -
Date: Mon, Nov 9 2009 20:58:45QUOTE (+Guitrum+ @ Nov 1 2009, 02:21 PM) <{POST_SNAPBACK}>there is no dimensions or measuring for this step theres no way to tell when to stop at the perfect moment.
the trick is to drill then try to shove the piece in. then drill a bit more then try to shove the piece in. keep doing this until it goes in. if you do it that way, its VERY snug.
the worst thing to do is to over drill. that makes the hole too big and then you have to use superglue and that is a fickle bitch...
but for me, i just made a starter hole by twisting an exacto knife then used my really small circular file
What?
My mech was crooked, and when I fixed the uneven back cap, I found I had overdrilled.
So I glued it on, And all I had to do was just place it in, and then wipe off the extra glue with an paper towel..
My only Qualm with this mod is that it's a bit more back heavy than a normal MX because of the mech.... -
Date: Thu, Nov 19 2009 01:43:40
nice pen but please pm me the awsners of 1 what was the white part of the ink tube modification you have 2 what was the first teal peice that goes through back of pen and 3 what where was the mechie put in I dident see that part a video tutorial would help alot but all in all great tutorial:)
~STOP QUOTING LONG POSTS~ -
Date: Thu, Nov 19 2009 22:26:05QUOTE (unicorndog @ Nov 18 2009, 08:43 PM) <{POST_SNAPBACK}>nice pen but please pm me the awsners of 1 what was the white part of the ink tube modification you have 2 what was the first teal peice that goes through back of pen and 3 what where was the mechie put in I dident see that part a video tutorial would help alot but all in all great tutorial:)
Don't quote the whole damn tutorial in your post, and either way It's still hard to understand.
1. electrical tape. get some at your hardware store.
2. The hgg backplug.
3. The cut Bic RT mech is inside the RSVP backcap. -
Date: Tue, Nov 24 2009 04:40:46
Mine doesn't click. Wasted about 3 freaking hours working on this and it ended up breaking.
But it didn't click. Like, when I pushed the clicker down from the retracted position it would just pop right back into the retracted position instead of going to the writable position. I examined the springs and the clic stick section. At first I thought I cut the clic stick part too short, but I did exactly as the picture showed.
God I'm frustrated. Any help? -
Date: Tue, Nov 24 2009 06:39:19QUOTE (Mr. Ninja @ Nov 23 2009, 08:40 PM) <{POST_SNAPBACK}>Mine doesn't click. Wasted about 3 freaking hours working on this and it ended up breaking.
But it didn't click. Like, when I pushed the clicker down from the retracted position it would just pop right back into the retracted position instead of going to the writable position. I examined the springs and the clic stick section. At first I thought I cut the clic stick part too short, but I did exactly as the picture showed.
God I'm frustrated. Any help?
ur problem is probably that the inktube slips out from the white retractable piece so it gets jammed. thats the point of using a toothpick that has been sanded into a point so that it constantly stays centered so it clicks cleanly -
Date: Tue, Nov 24 2009 17:32:51
That's not the problem; I made sure about that. I put the pointy end in the white thing and the flat end in the inktube (made it fit by slimming it down).
The writing part of the inktube comes all the way out when I click, and instead of staying out, it just shoots right back in. At this point, I would think it would have something to do with the clic stic part but I cut it exactly the way you did. -
Date: Thu, Feb 4 2010 14:30:23
How do you bore the hole exactly?
-
Date: Thu, Feb 4 2010 14:58:01QUOTE (Zerotran0 @ Feb 4 2010, 07:30 AM) <{POST_SNAPBACK}>How do you bore the hole exactly?
start with x-acto just making a small hole in the top, enough to get a circular file through. if u have no circular file, wrap sand paper around a long nail or metal skewer and use that -
Date: Tue, Feb 9 2010 04:56:23QUOTE (+Guitrum+ @ Feb 4 2010, 06:58 AM) <{POST_SNAPBACK}>start with x-acto just making a small hole in the top, enough to get a circular file through. if u have no circular file, wrap sand paper around a long nail or metal skewer and use that
this mod is so laborious >_>
just the backcap took me forever D: -
Date: Tue, Feb 9 2010 05:47:15QUOTE (Colin @ Feb 8 2010, 08:56 PM) <{POST_SNAPBACK}>this mod is so laborious >_>
just the backcap took me forever D:
like i said, it isnt an easy mod to make, but thats the price to pay for such cheap and available materials -
Date: Fri, Feb 19 2010 15:19:15
can the bic clic stic be subbed?with g2 or something?
-
Date: Sat, Feb 20 2010 04:10:58QUOTE (cardswithpens @ Feb 19 2010, 08:19 AM) <{POST_SNAPBACK}>can the bic clic stic be subbed?with g2 or something?
... that's an entirely different pen....
-
Date: Sat, Feb 20 2010 10:44:33QUOTE (+Guitrum+ @ Feb 20 2010, 12:10 PM) <{POST_SNAPBACK}>... that's an entirely different pen....
oh.well can it be subbbed at all? -
Date: Sun, Feb 21 2010 02:11:29QUOTE (cardswithpens @ Feb 20 2010, 04:44 AM) <{POST_SNAPBACK}>oh.well can it be subbbed at all?
no. just get a bic clic. just about every company gives them away for free. -
Date: Sun, Feb 21 2010 10:59:41
not in the philippines,bic clic stic not avail here
-
Date: Sun, Feb 21 2010 23:44:44QUOTE (cardswithpens @ Feb 21 2010, 02:59 AM) <{POST_SNAPBACK}>not in the philippines,bic clic stic not avail here
gosh i sure wish there was a way to trade with other people who have things we need... -
Date: Mon, Feb 22 2010 15:48:44QUOTE (+Guitrum+ @ Feb 22 2010, 07:44 AM) <{POST_SNAPBACK}>gosh i sure wish there was a way to trade with other people who have things we need...
im just saying. -
Date: Tue, Feb 23 2010 01:46:35
There are subs, but they're all made by bic, so you might as well get a bic clic.
-
Date: Sun, Mar 7 2010 22:00:05
A couple of questions.
1: This mod does work with RSVP Colors right?
2: While constructing this mod, i realized that when i clicked the pen, it wouldnt retract back to its normal state. The inktube would be stuck and i couldnt push it back in unless i applied pressure to the inktube tip. How to fix? The main thing is that the pen won't retract back.
3: Just a pet peeve. The piece is the backcap of the RSVP is slightly crooked on mine. How to fix? Is it how the backcap is bored out that affects the straightness of the piece? -
Date: Sun, Mar 7 2010 22:13:19
1. I'm pretty sure it'll work with any kind of RSVPs.
2. I think that it could be one of two things, first is there isn't enough tension in your spring so it doesn't click back properly. Try putting the spring closer to the tip of the ink tube. Second, did you use a toothpick to extend the ink tube? The toothpick could be causing friction between the white click mechanism and the toothpick, so it's getting jammed. Try adding a bit of tape over the tip of the tooth pick.
3. And That probably has to do with how the RSVP back cap was drilled out.
Another think I'd like to add to the tutorial, if you don't like how when you click the cap to extend the tip, and the cap stays in the "retracted" position, you can add a spring in between the click mechanism and the hgg back plug in the cap, so that the cap can return to it's original position even with the tip exposed. -
Date: Mon, Mar 8 2010 07:53:05QUOTE (+Guitrum+ @ Oct 30 2009, 06:39 PM) <{POST_SNAPBACK}>2)
Spoiler:
Disassemble the BIC Clic Stic mechanism to have what is shown. Discard what is on the right and keep what is on the left.
so liek i threw out the clic mechanism, how am i supposed to make this mod with just the clip and endpiece nao?
l2 left and right. you got it backwards.
otherwise...
I iz definitely gonna make this mod when i acquire a bic-clic's dic.
-
Date: Mon, Mar 8 2010 08:51:37QUOTE (Syrn @ Mar 7 2010, 11:53 PM) <{POST_SNAPBACK}>so liek i threw out the clic mechanism, how am i supposed to make this mod with just the clip and endpiece nao?
l2 left and right. you got it backwards.
otherwise...
I iz definitely gonna make this mod when i acquire a bic-clic's dic.
or you could have looked at the picture and seen the circled and the x'd parts
-
Date: Thu, Mar 18 2010 04:01:21
is there a sub 4 the bic clic stic?
-
Date: Thu, Mar 18 2010 04:22:45
not really
seriously, they're one of the most common advertising pens used in the states. just snatch one, no one cares about 10 cents. -
Date: Thu, Mar 18 2010 23:56:39
Is there any replacements for the back plug of the HGG?
-
Date: Fri, Mar 19 2010 00:31:13QUOTE (AllenMuff @ Mar 18 2010, 04:56 PM) <{POST_SNAPBACK}>Is there any replacements for the back plug of the HGG?
moar tape -
Date: Sat, Mar 20 2010 03:25:10QUOTE (+Guitrum+ @ Mar 18 2010, 05:31 PM) <{POST_SNAPBACK}>moar tape
what do you mean? like more tape on the clicker? -
Date: Sun, Mar 28 2010 15:41:18
So yeah I've been working on the backcap for this mod and I just want to be sure if I'm doing right ( don't want to go back to walmart and buy more RSVPs) . I've been filing the inside and top of the backcap and I'm getting close to the screwing lines but the piece still doesn't seem decided to go in.
 So here are some pictures.
Spoiler:
Spoiler:
Spoiler:
Spoiler:
Please reply
-
Date: Mon, Mar 29 2010 19:33:24
well, when you screw on the backcap to the rsvp, the bic piece should hit the rsvp threads and be pushed through the other side of the backcap, so if its snug in there, it looks like ur doing it right, you just have it in the wrong side. from what i can tell.
-
Date: Tue, Mar 30 2010 03:25:22QUOTE (Calvin @ Mar 28 2010, 10:41 AM) <{POST_SNAPBACK}>So yeah I've been working on the backcap for this mod and I just want to be sure if I'm doing right ( don't want to go back to walmart and buy more RSVPs) . I've been filing the inside and top of the backcap and I'm getting close to the screwing lines but the piece still doesn't seem decided to go in. So here are some pictures.
Spoiler:
Spoiler:
Spoiler:
Spoiler:
Please reply
same thing happened to me... you have to shove it in further. don't try to use just your finger to push it in. I used a metal rod that was the same diameter of the bic piece to push it in there further. -
Date: Sat, Apr 17 2010 21:17:59QUOTE (hoiboy @ Mar 17 2010, 09:22 PM) <{POST_SNAPBACK}>not really
seriously, they're one of the most common advertising pens used in the states. just snatch one, no one cares about 10 cents.
ok thnx


